


Table of Content
Table of Content
Step 0. Log in to your Personal Account and start the Business ApplicationStep 1. Select Your Role in the CompanyStep 2. Confirm Your Phone Number (KYC Link)Step 3. Select company type and licensing statusStep 4. Select Economic ActivitiesStep 5. Fill in Company InformationStep 6. Enter Registered and Business AddressesRegistered addressBusiness addressStep 7. Add Director InformationStep 8. Upload Company Documents and SubmitStep 9. Application SubmittedMemo
Table of Content
Please note: opening a personal (B2C) account is mandatory before starting the business application. Open your personal account in the ;blackcat app
Step 0. Log in to your Personal Account and start the Business Application
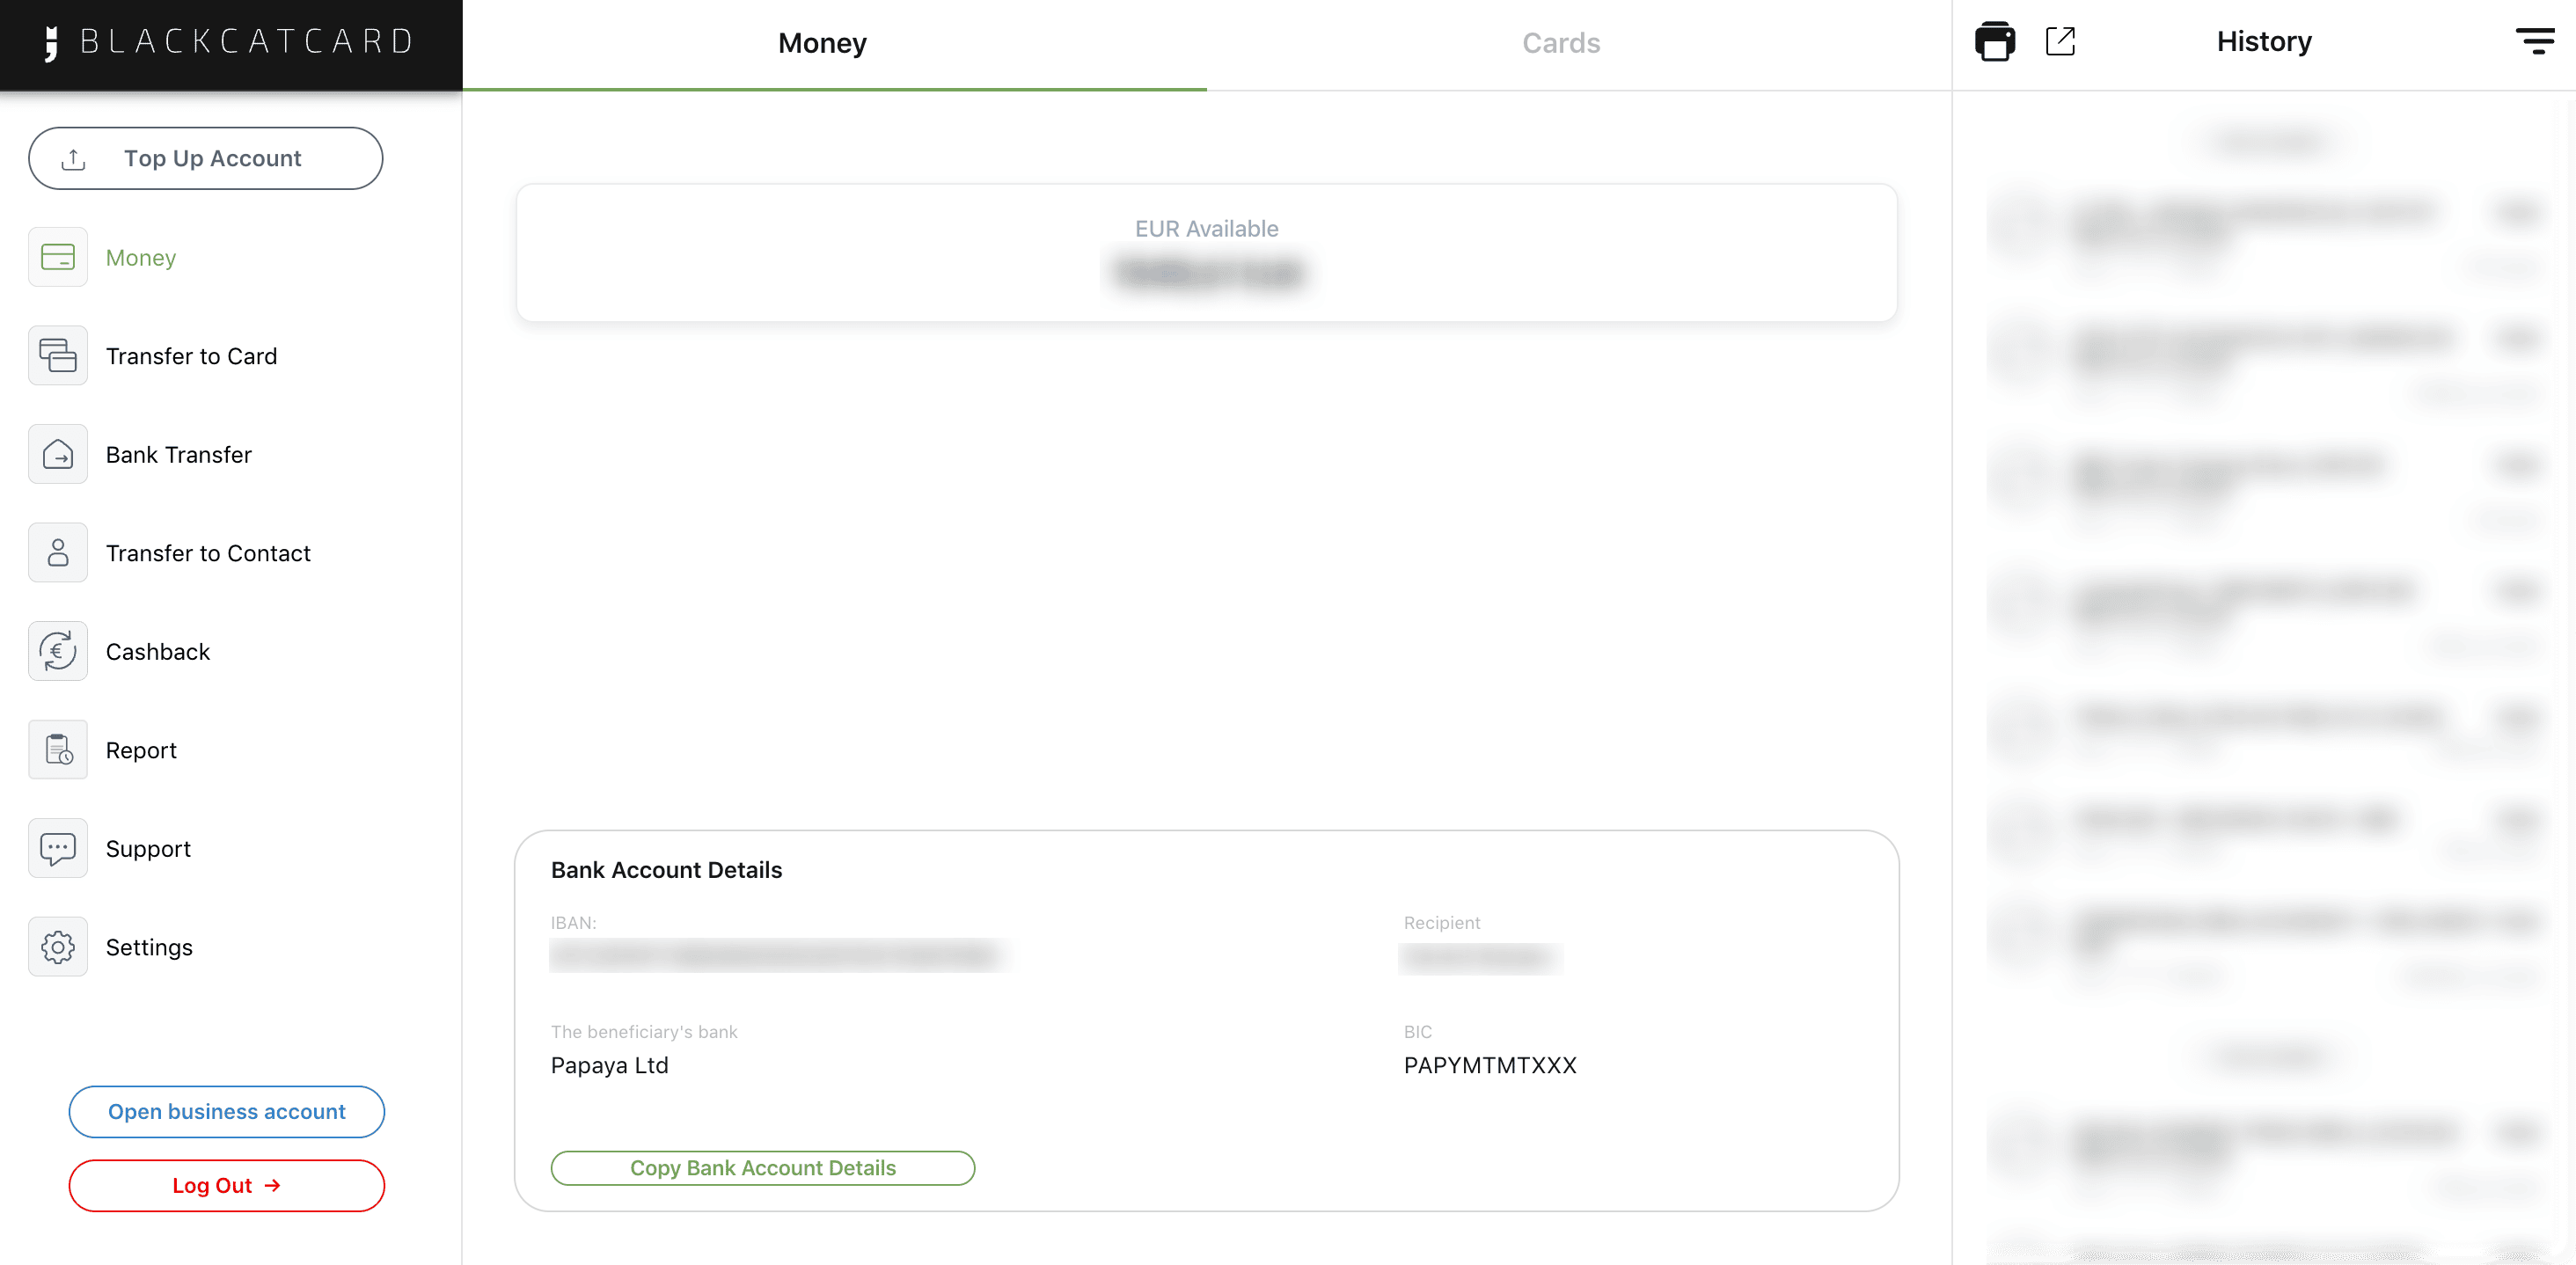
What to do:
- Log in to your personal ;blackcat account using desktop and the link: https://desktop.blackcatcard.com/login
- In the left-side menu, click Open business account.
Important:
- Business accounts are opened only from an existing personal account.
- If you do not have a personal account yet, complete B2C registration first.
- Business onboarding is not supported on mobile — desktop only.
Step 1. Select Your Role in the Company
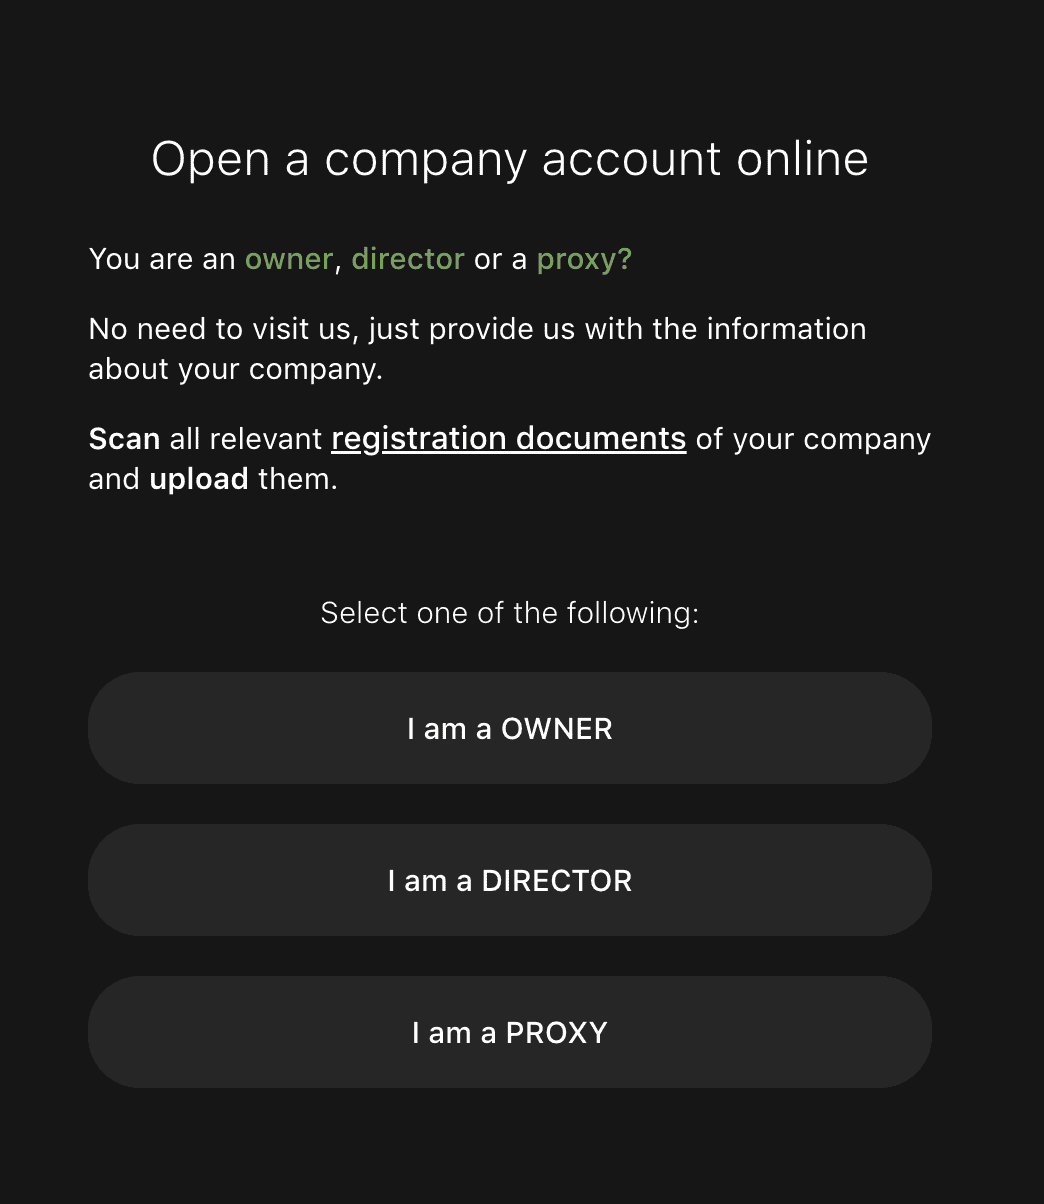
How to choose:
- OWNER — you are a beneficial owner (UBO).
- DIRECTOR — you are a company director, not necessarily a shareholder.
- PROXY — you act on behalf of the company under a Power of Attorney.
Important:
- If you are both Owner and Director, select OWNER.
- Selecting PROXY requires uploading a valid Power of Attorney later.
Step 2. Confirm Your Phone Number (KYC Link)
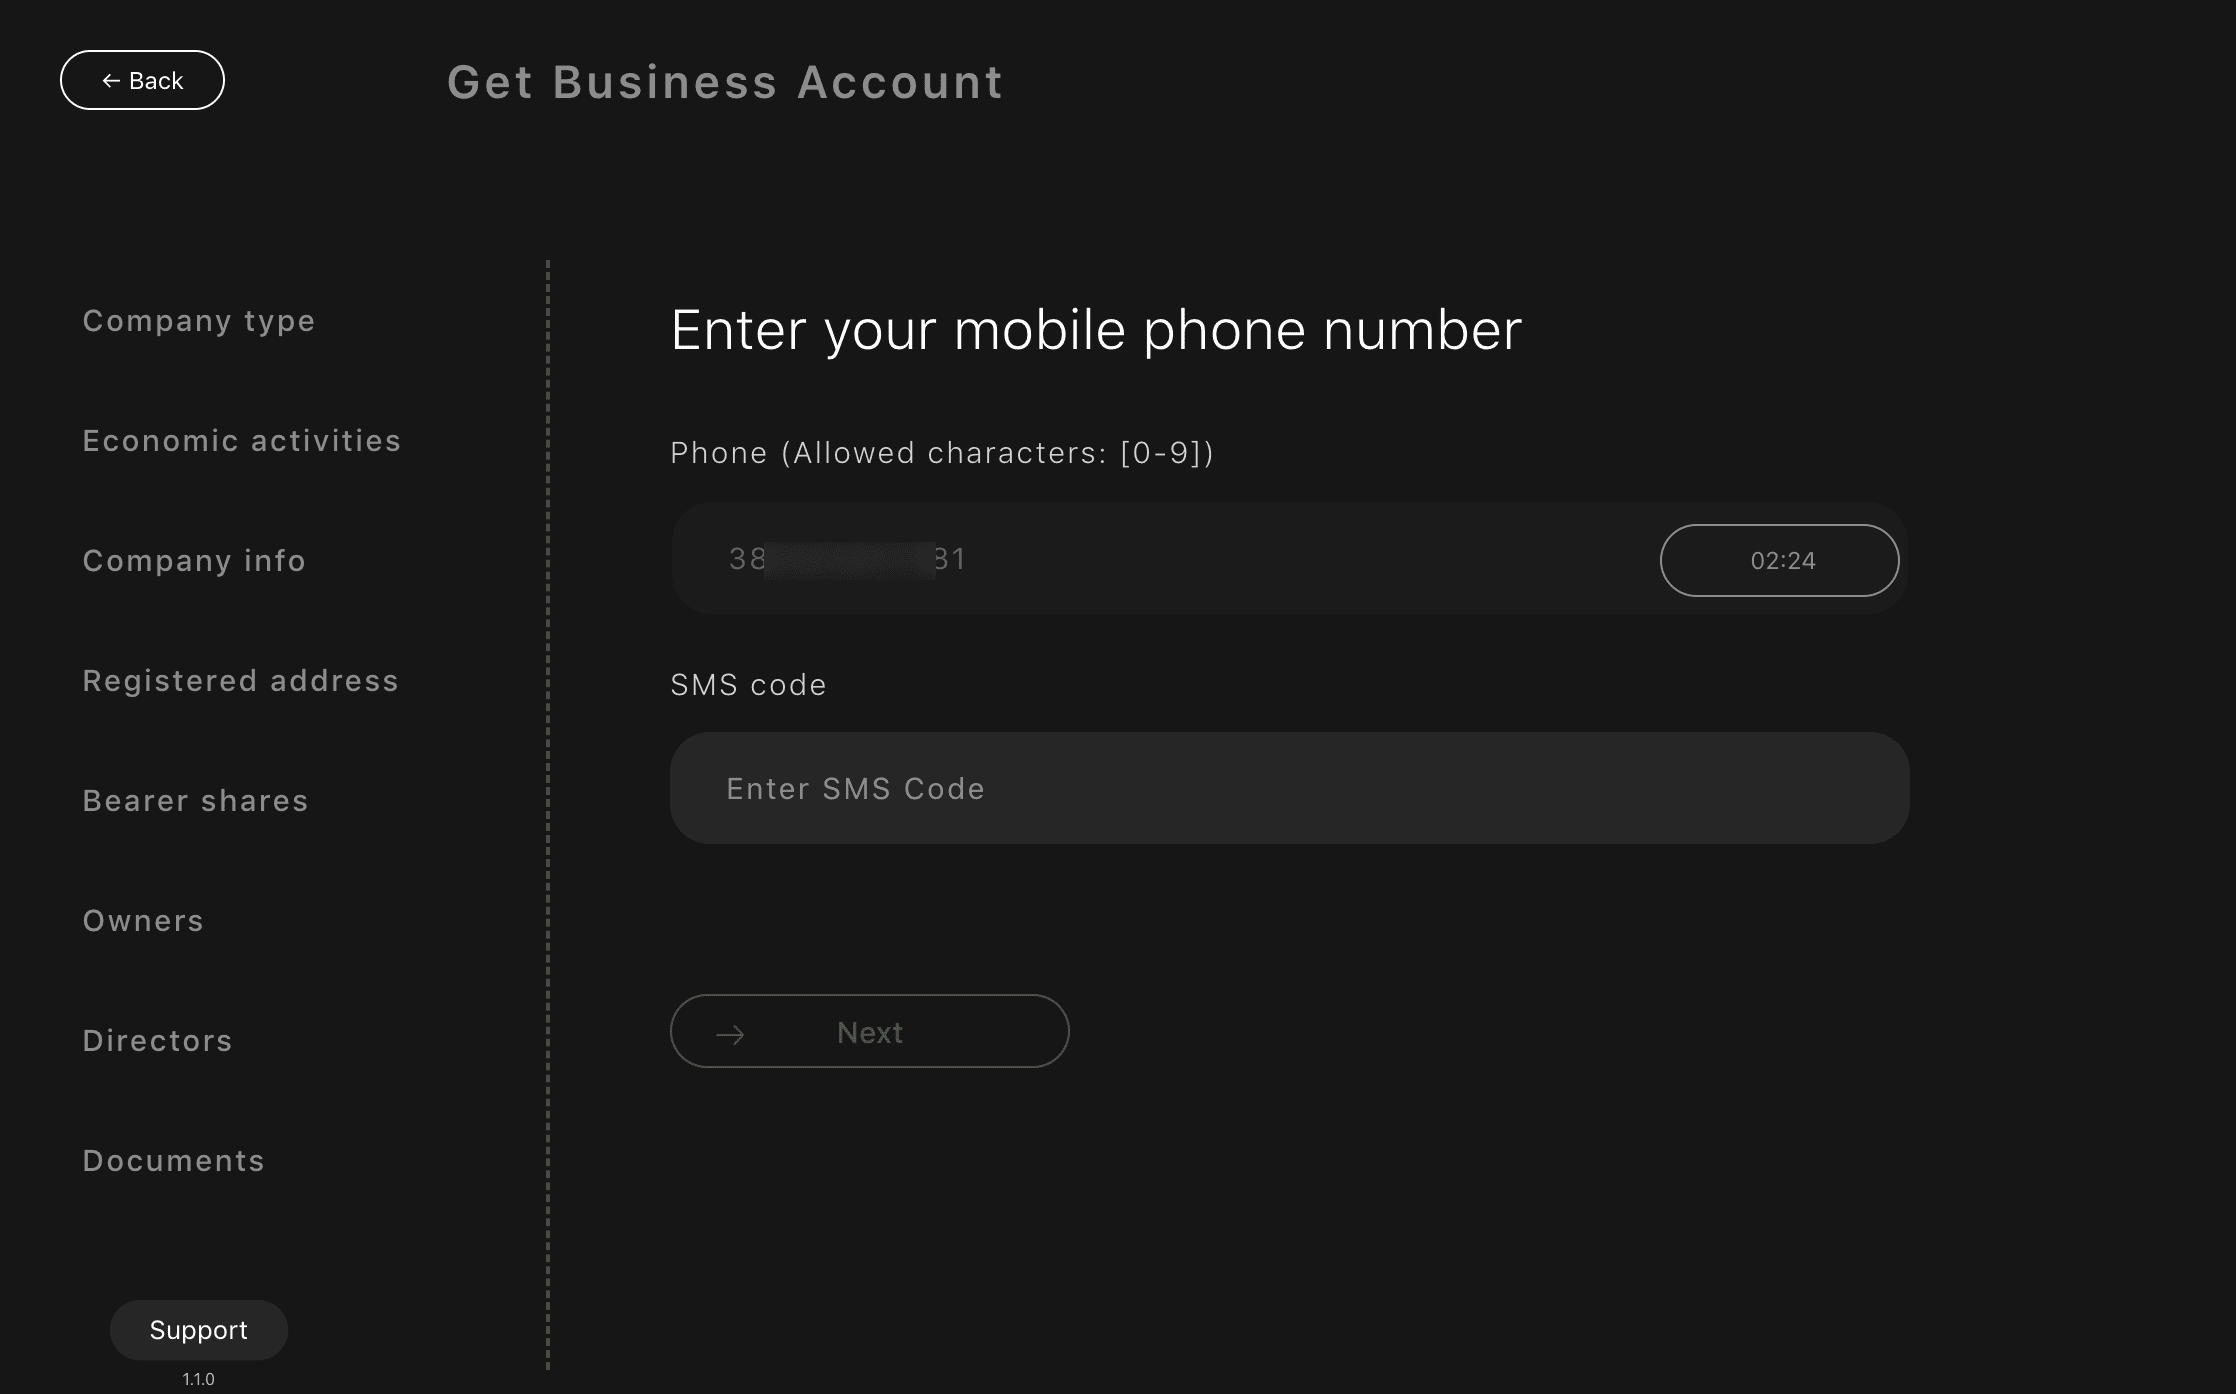
What to do:
- Enter your mobile phone number.
- Receive the SMS code.
- Enter the code and click Next.
Why this step matters:
- This links your personal KYC with the business application.
- No repeated identity verification is required later.
Important:
- Use the same phone number as in your personal account.
- Numbers must be entered using digits only.
Common mistakes:
- Using a different phone number.
- Entering symbols or spaces.
- Refreshing the page instead of requesting a new SMS.
Step 3. Select company type and licensing status
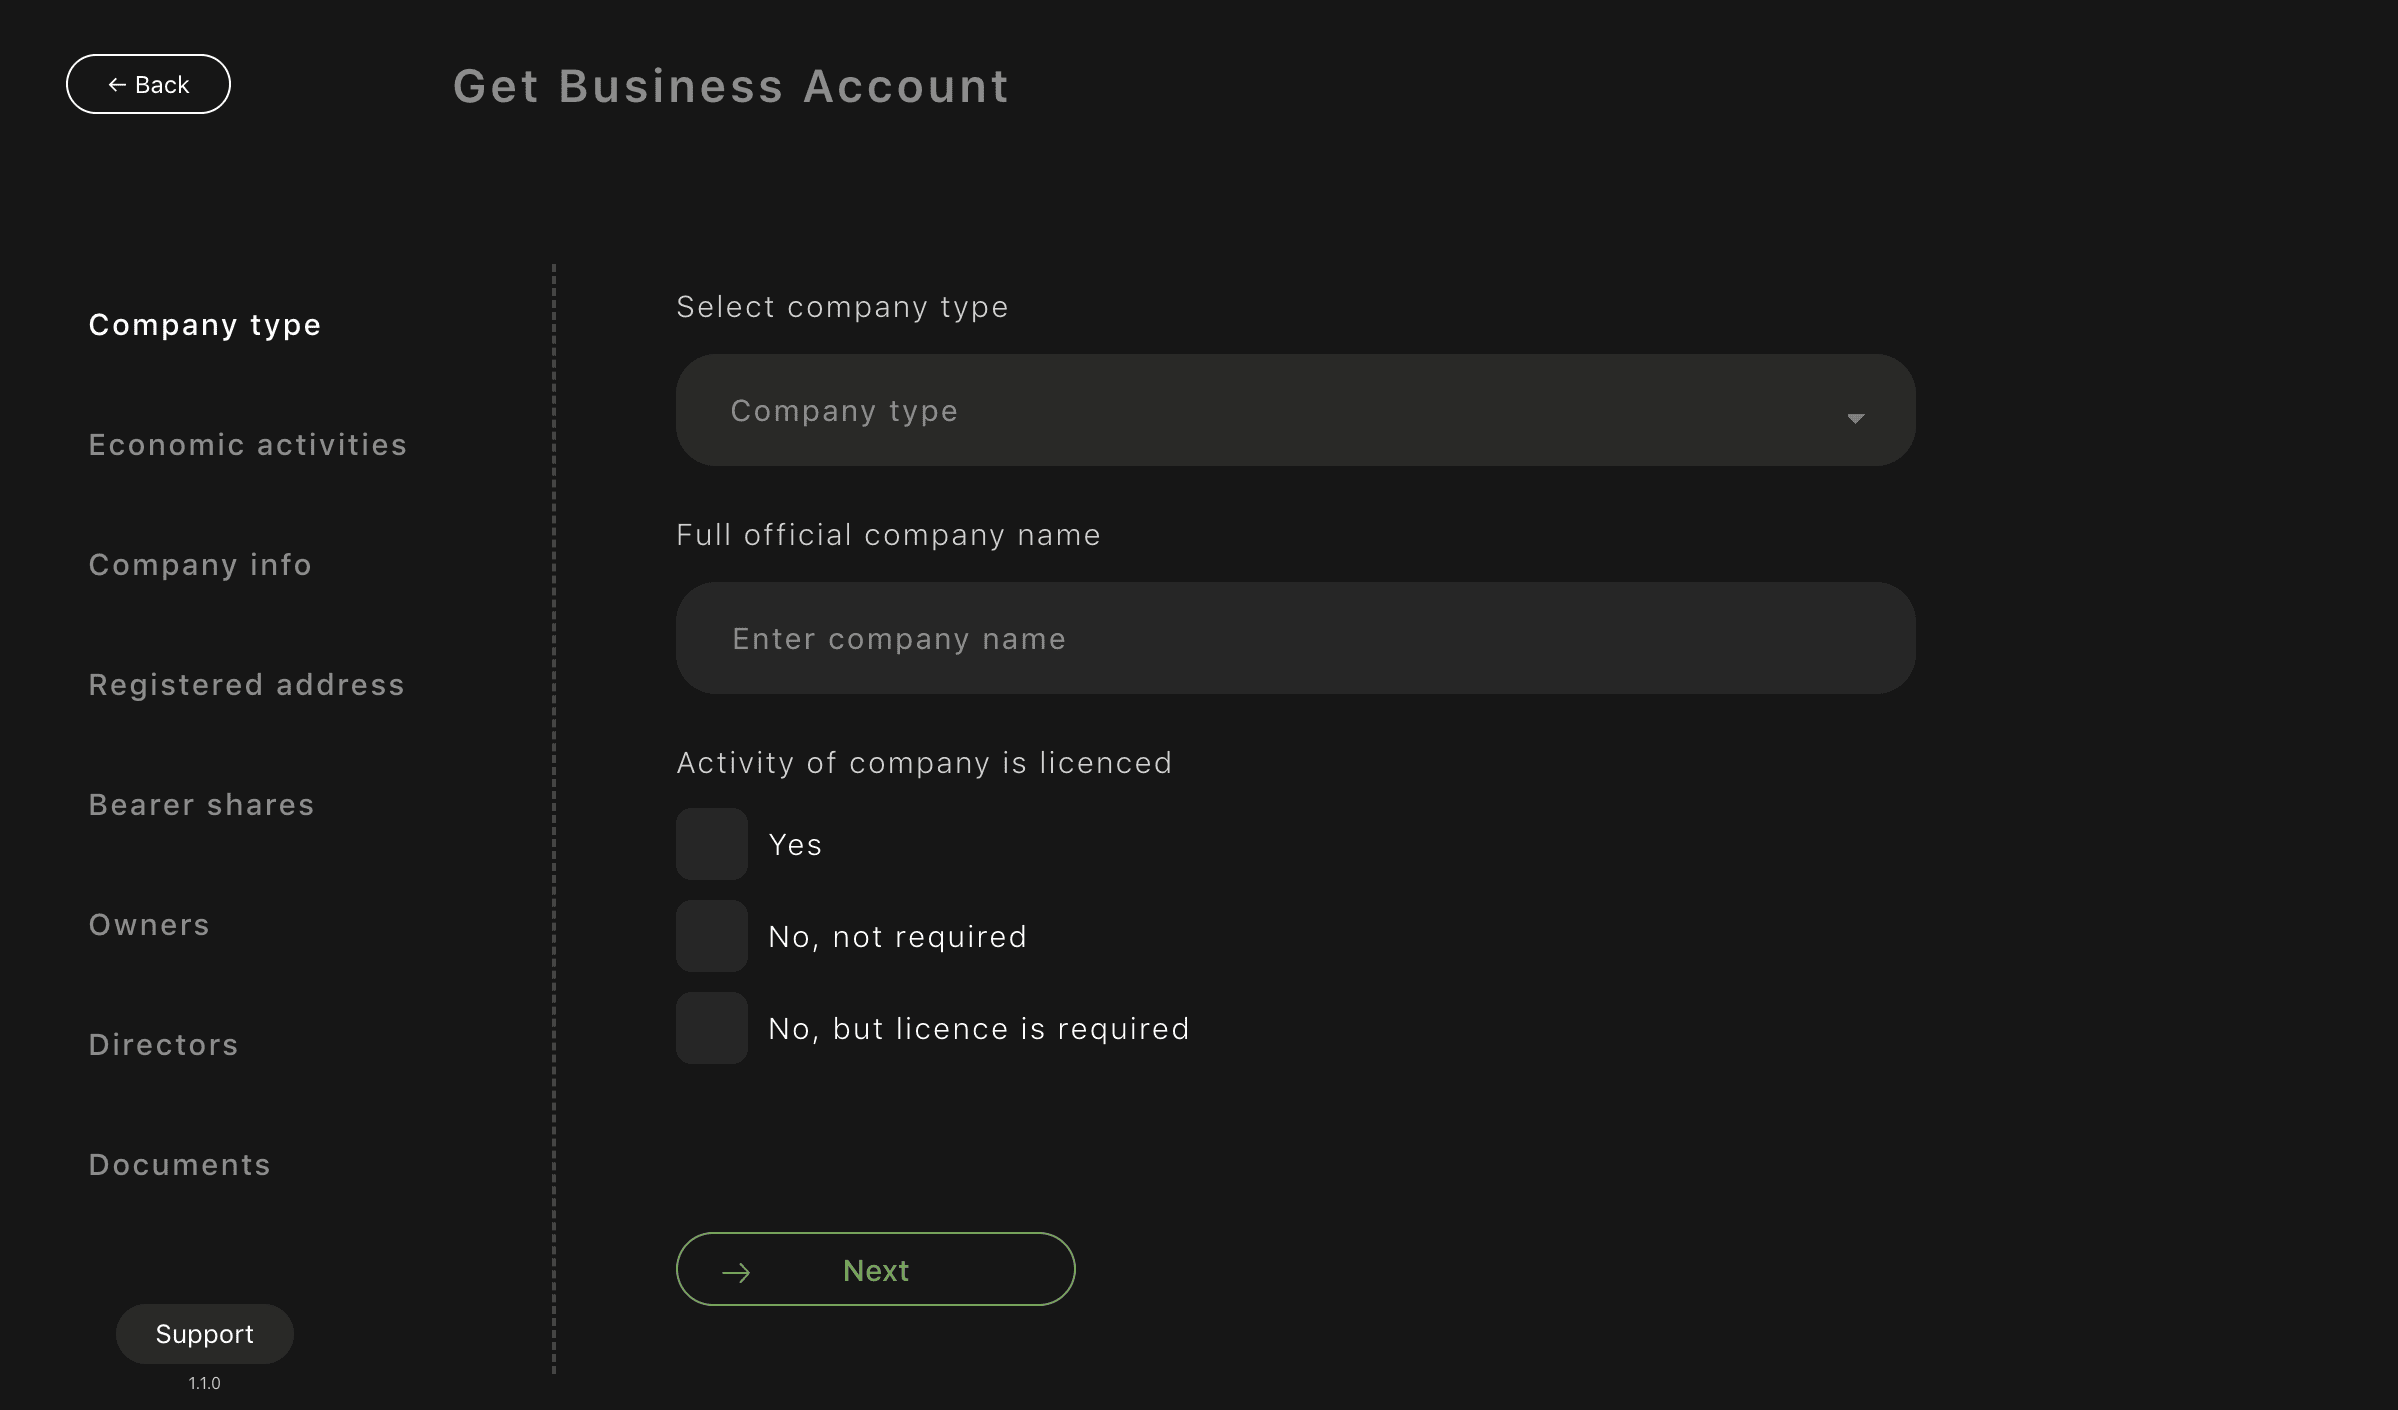
What you see:
- Section Company type in the Business Account application.
- Fields to define the legal form of the company and its licensing status.
What you need to do:
1. Select company type
- Choose the legal form of your company from the dropdown list
- The selected type must match your registration documents.
2. Enter full official company name
- Enter the complete legal name of the company.
- The name must be identical to the name stated in the Certificate of Incorporation / Extract.
- Do not use abbreviations or trading names.
3 . Specify whether the company activity is licensed
4 . Select one of the following options:
- Yes
Choose this if your business activity is licensed and the licence has already been issued (e.g. financial services, gambling, crypto, etc.).
- No, not required
Choose this if your type of business does not require a licence in the country of operation.
- No, but licence is required
Choose this if a licence is required for your activity but has not yet been obtained.
What is important:
- Your answer here directly affects the compliance review.
- Incorrect selection may result in additional questions or delays.
- If a licence is required, supporting documents or explanations may be requested later.
Common mistakes:
- Selecting “No, not required” when the activity is regulated.
- Using a brand or commercial name instead of the legal company name.
- Choosing a company type that does not match registration documents. After completing this step:
- Click Next to continue to the following section.
Step 4. Select Economic Activities
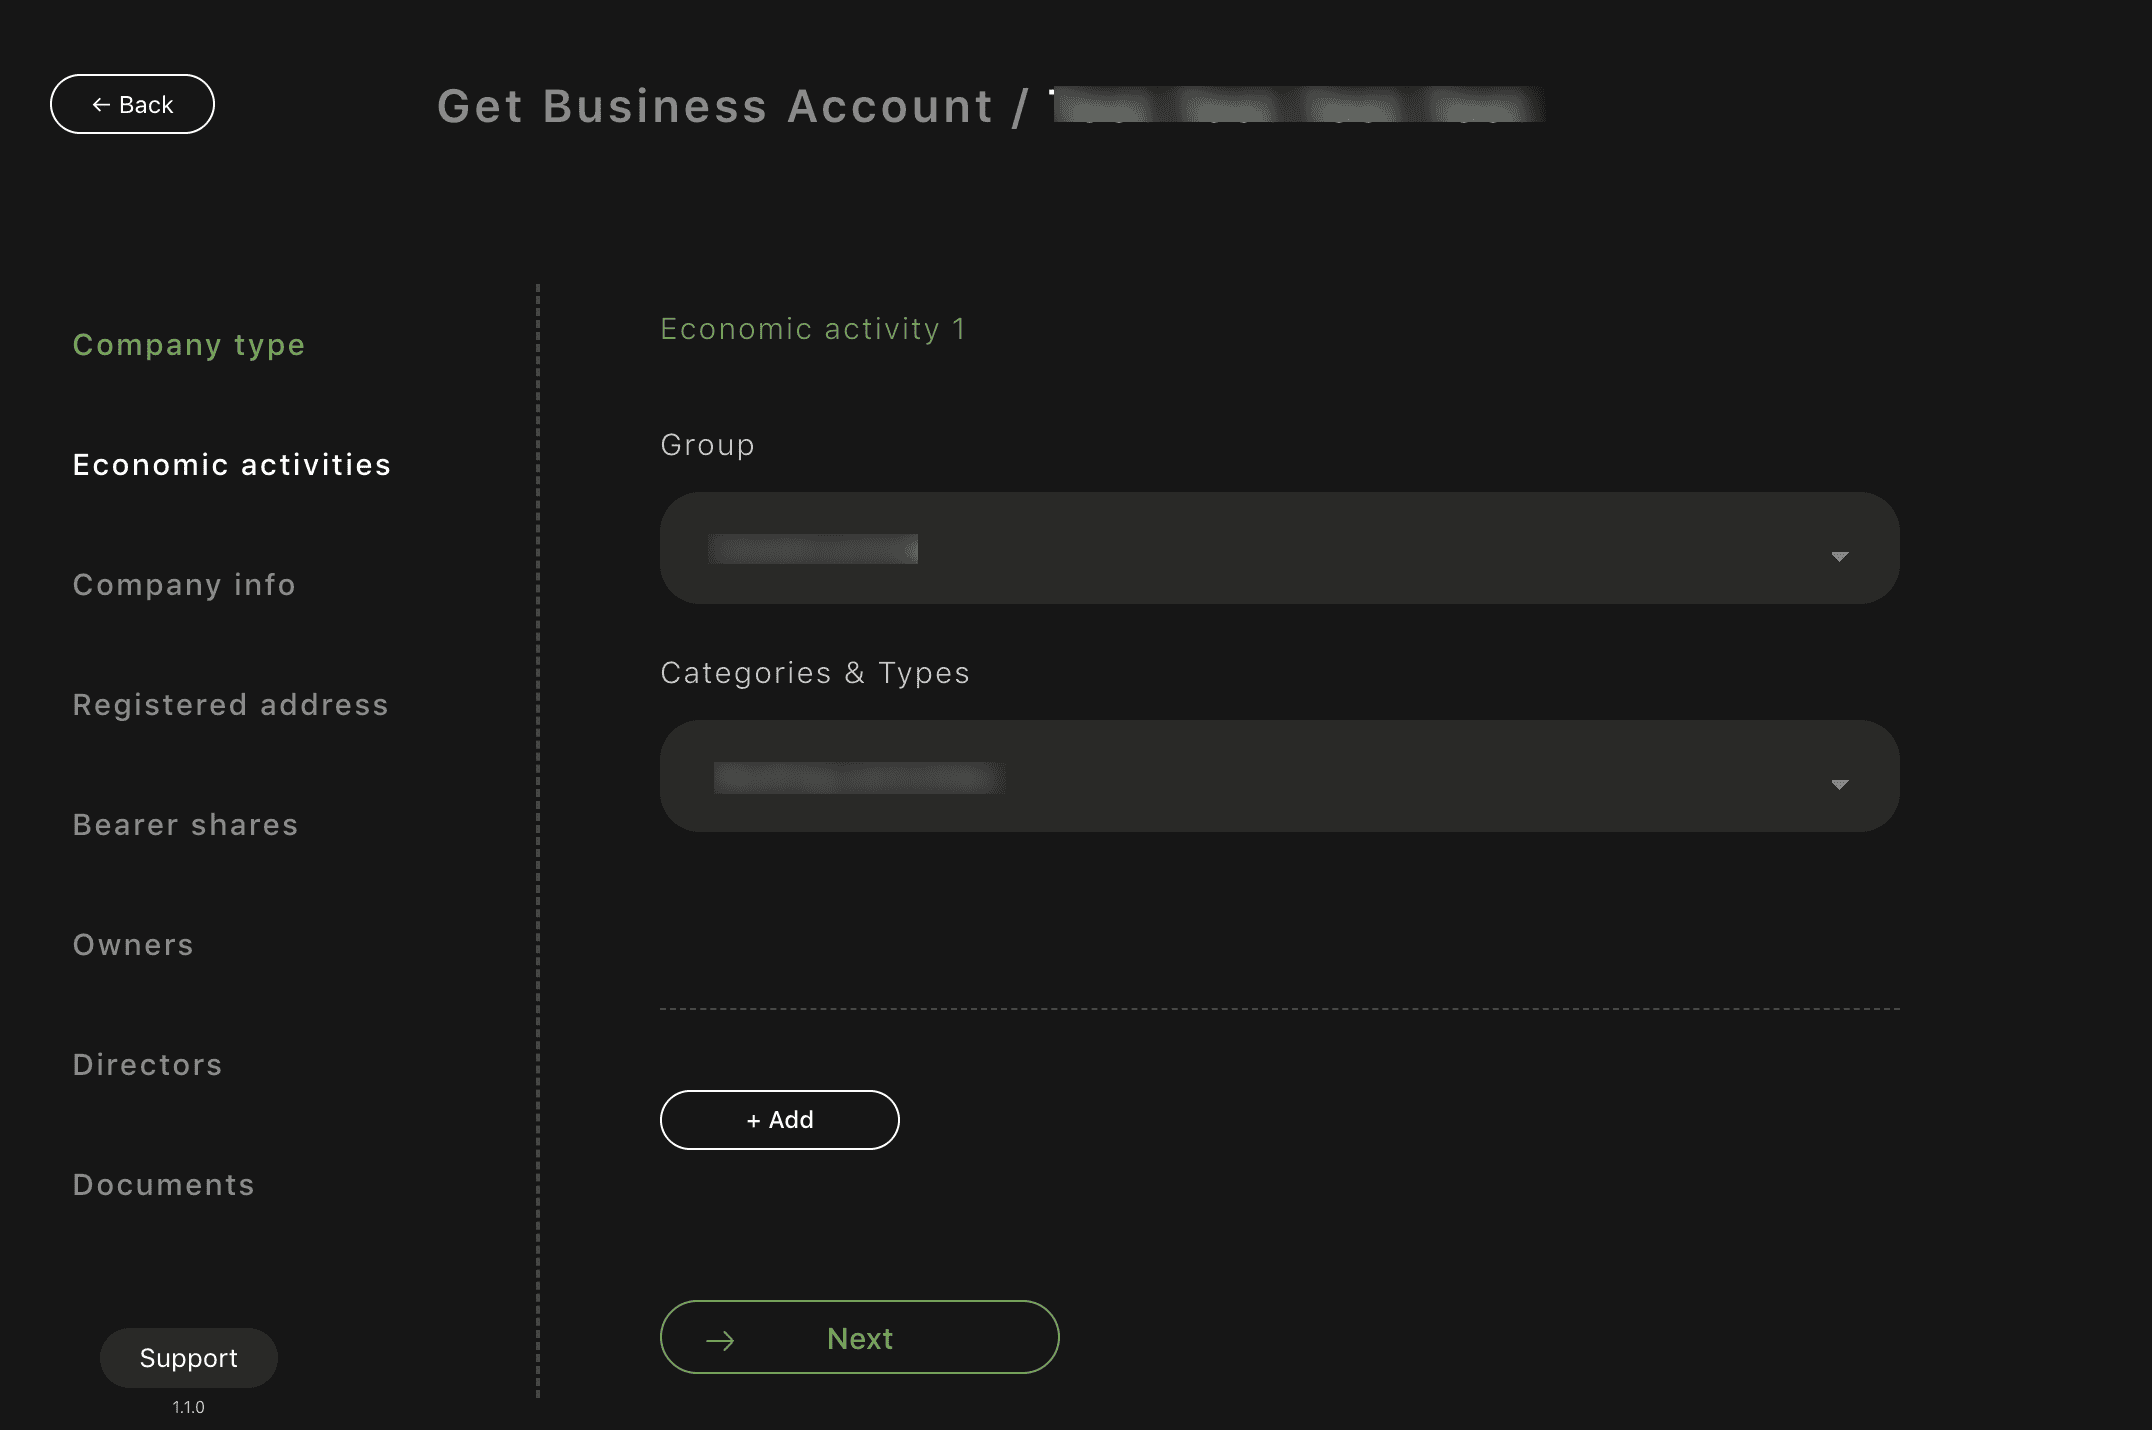
What you see:
Section Economic activities in the Business Account application.
What you need to do:
1 . Select Group
- First, choose the main business Group from the dropdown.
- The Group defines the high-level industry your company operates in.
2 . Select Categories & Types
- After selecting the Group, choose the relevant Categories & Types.
- Available categories depend on the previously selected Group. 3 . Add additional activities (if applicable)
- If your company operates in more than one activity, click + Add.
- Repeat the same flow: select Group first, then Categories & Types.
What is important:
- Group must always be selected first — Categories cannot be chosen without it.
- Selected activities must reflect the real business model of the company.
- The chosen activities directly affect compliance review and risk assessment.
Common mistakes:
- Trying to select Categories before choosing a Group.
- Selecting overly broad or unrelated activities.
- Adding activities that are not mentioned in company documents or website.
After completing this step: Click Next to continue with the application.
Step 5. Fill in Company Information
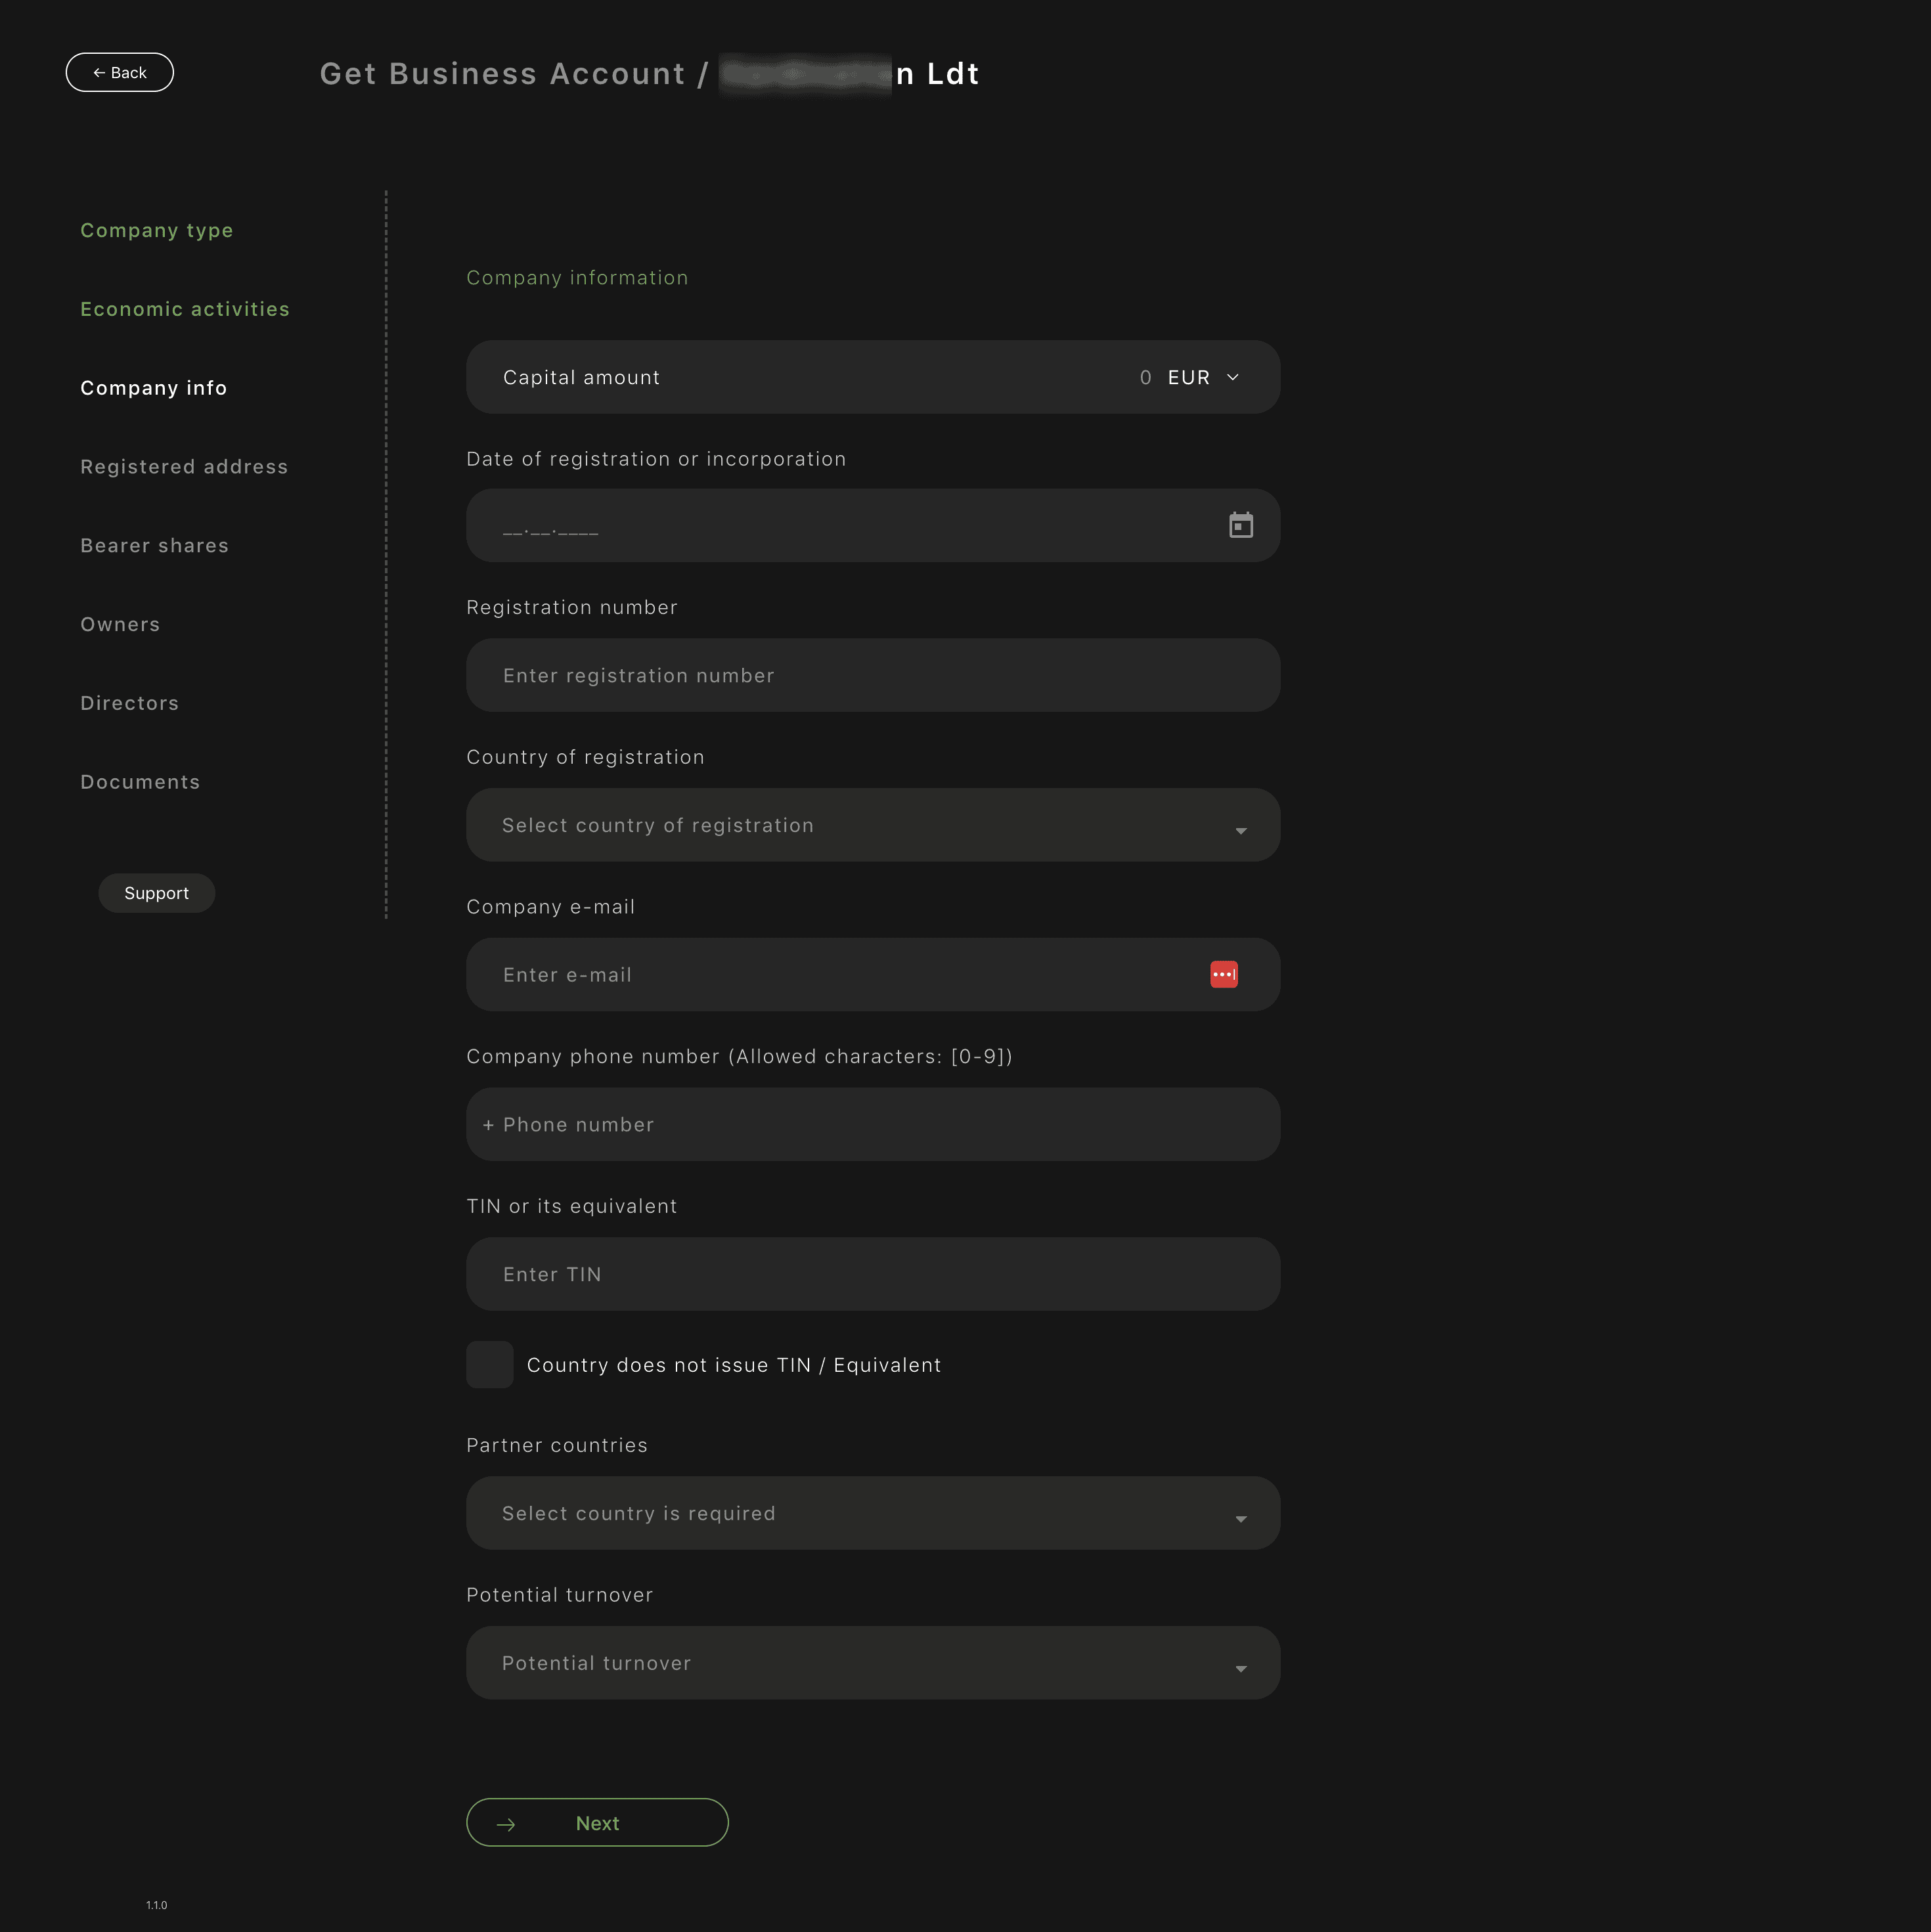
You must complete all company details:
Required fields:
- Capital amount
- Date of registration or incorporation
- Select the date using the calendar icon.
- Registration number
- Country of registration
- Company e-mail
- Company phone number
- TIN or equivalent
- If unavailable, check Country does not issue TIN.
- Partner countries
- Potential turnover
Important:
- All data must match official company documents.
- Dates cannot be typed manually — use the calendar.
- Provide realistic turnover and countries of operation.
Common mistakes:
- Using personal e-mail instead of company e-mail.
- Incorrect registration date.
- Understating business activity “to be safe”.
Step 6. Enter Registered and Business Addresses
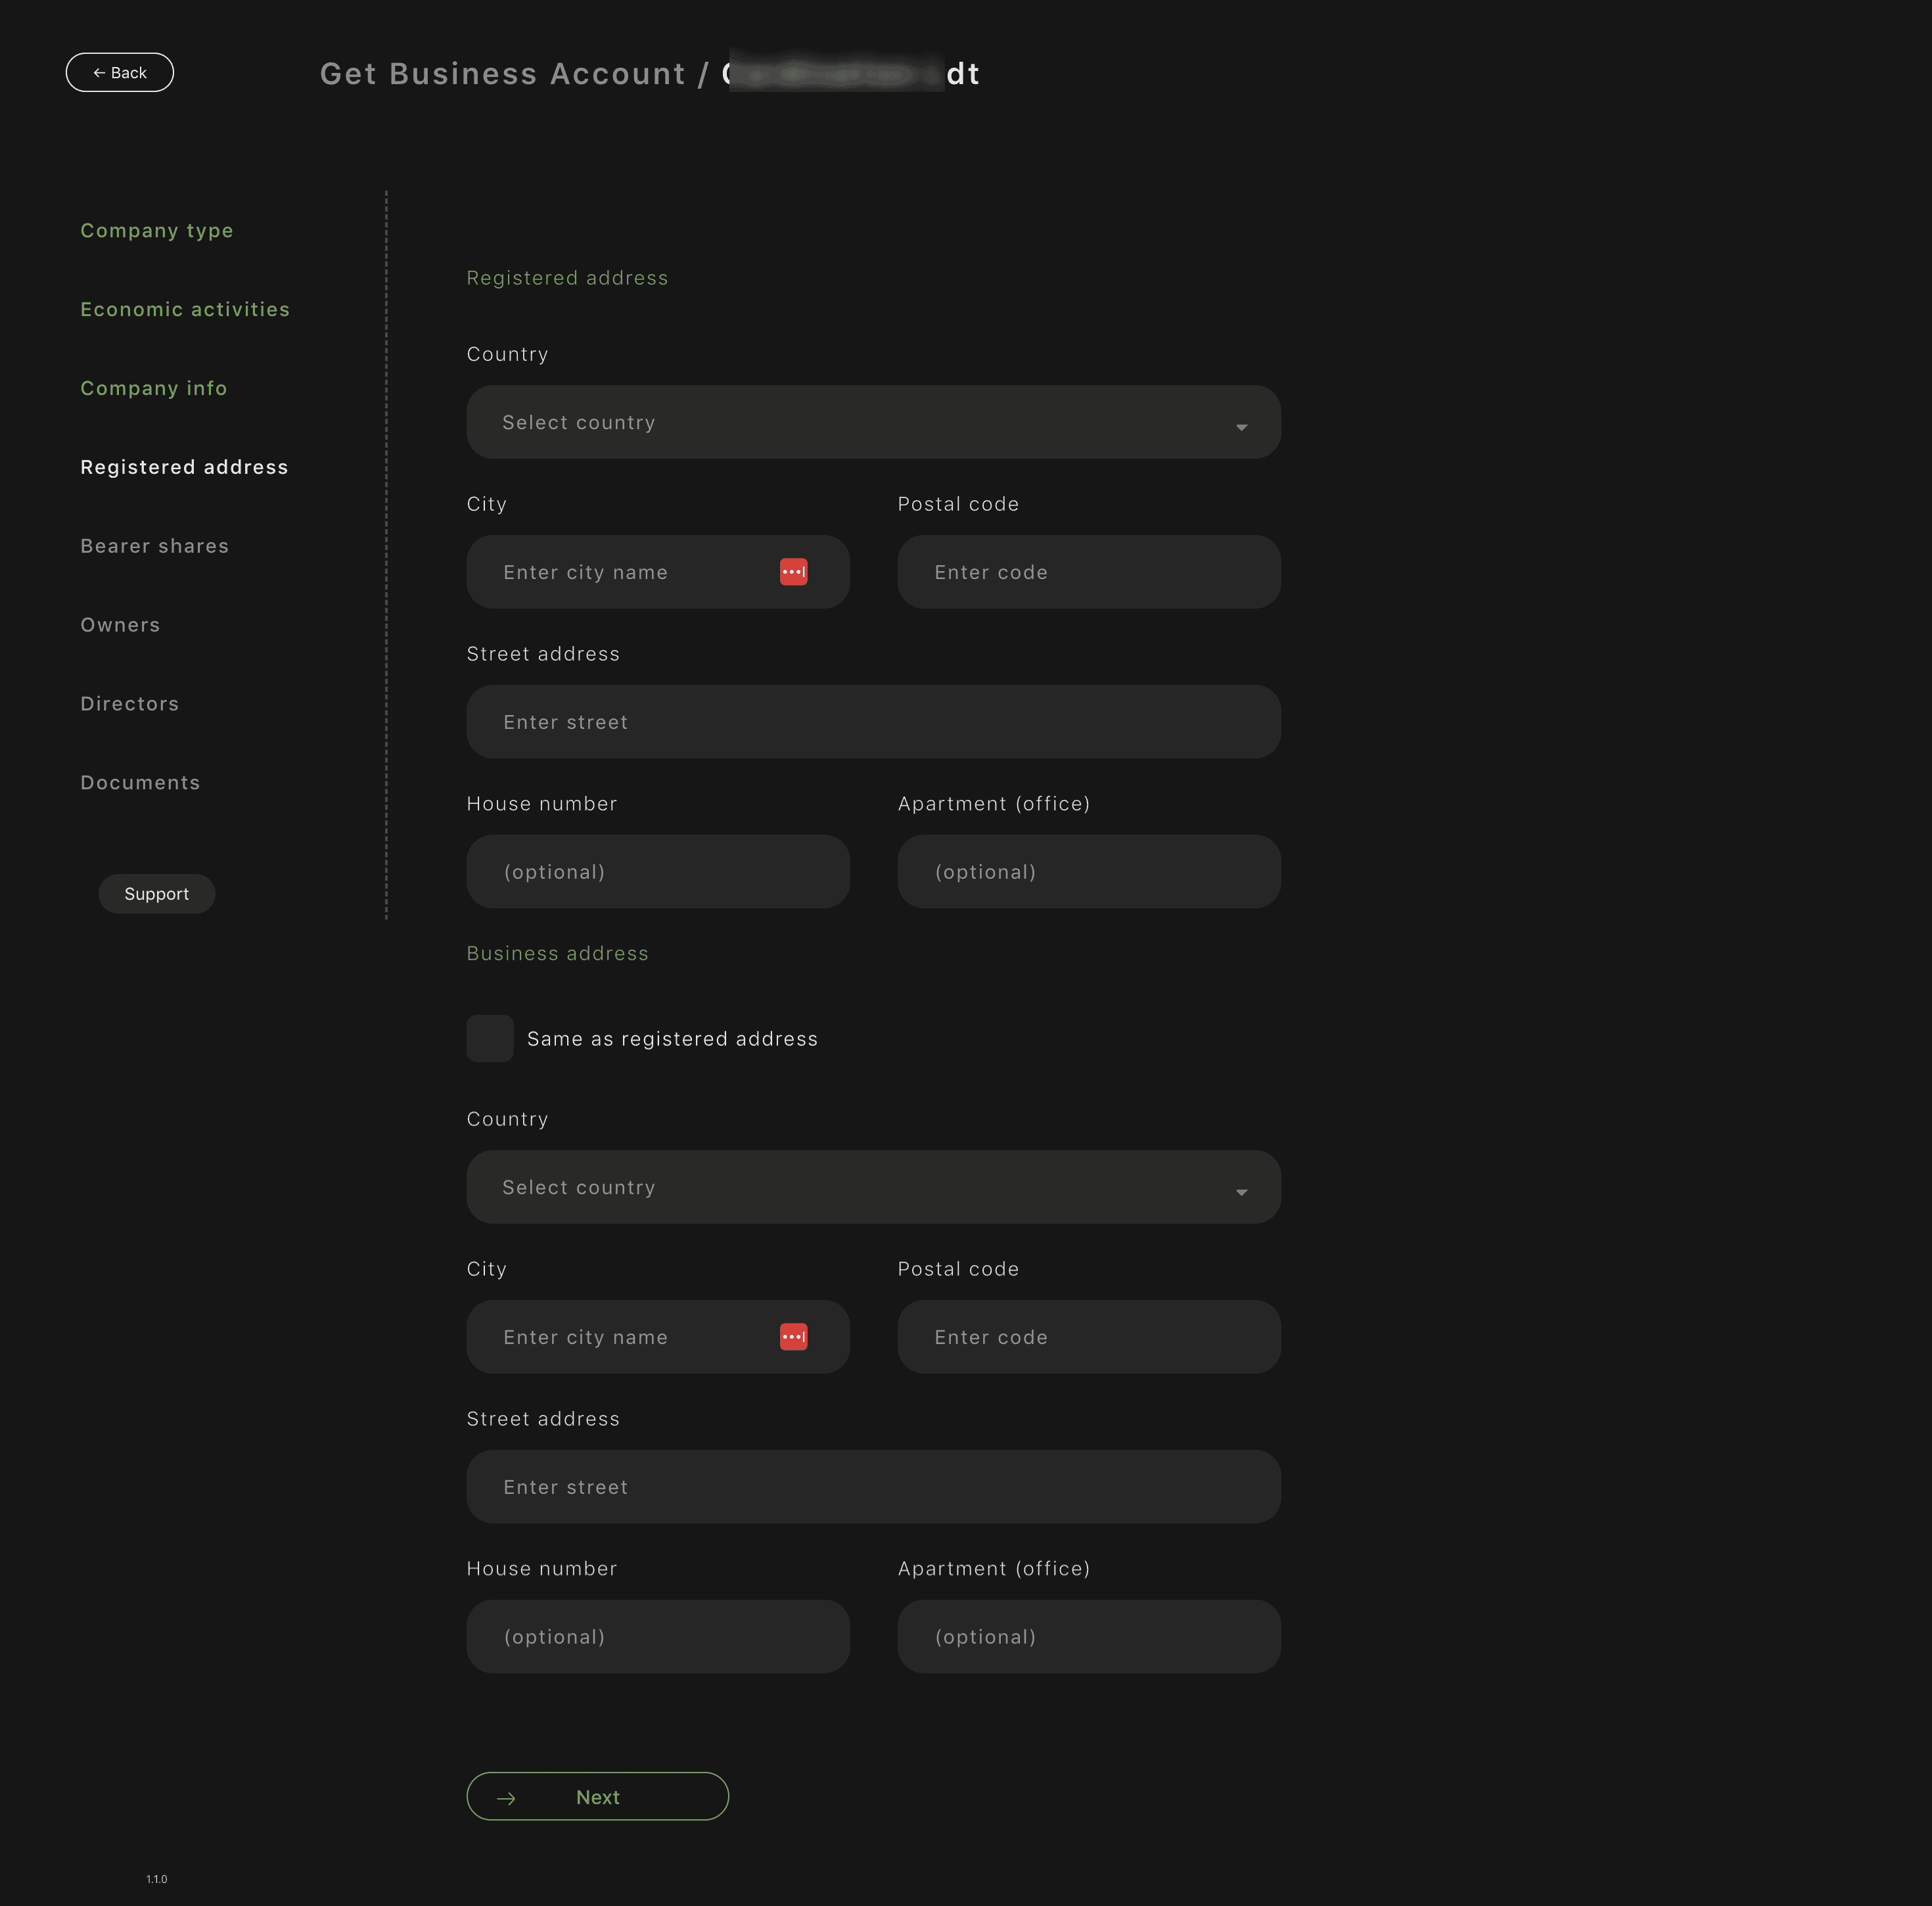
Registered address
Fill exactly as stated in company documents:
- Country
- City
- Postal code
- Street
- House number
- Office / apartment (if applicable)
Business address
- If the business address is the same, check Same as registered address.
- If different, fill it manually.
Important:
- Address mismatch is one of the most common compliance delays.
- Virtual offices must be entered exactly as registered.
Step 7. Add Director Information
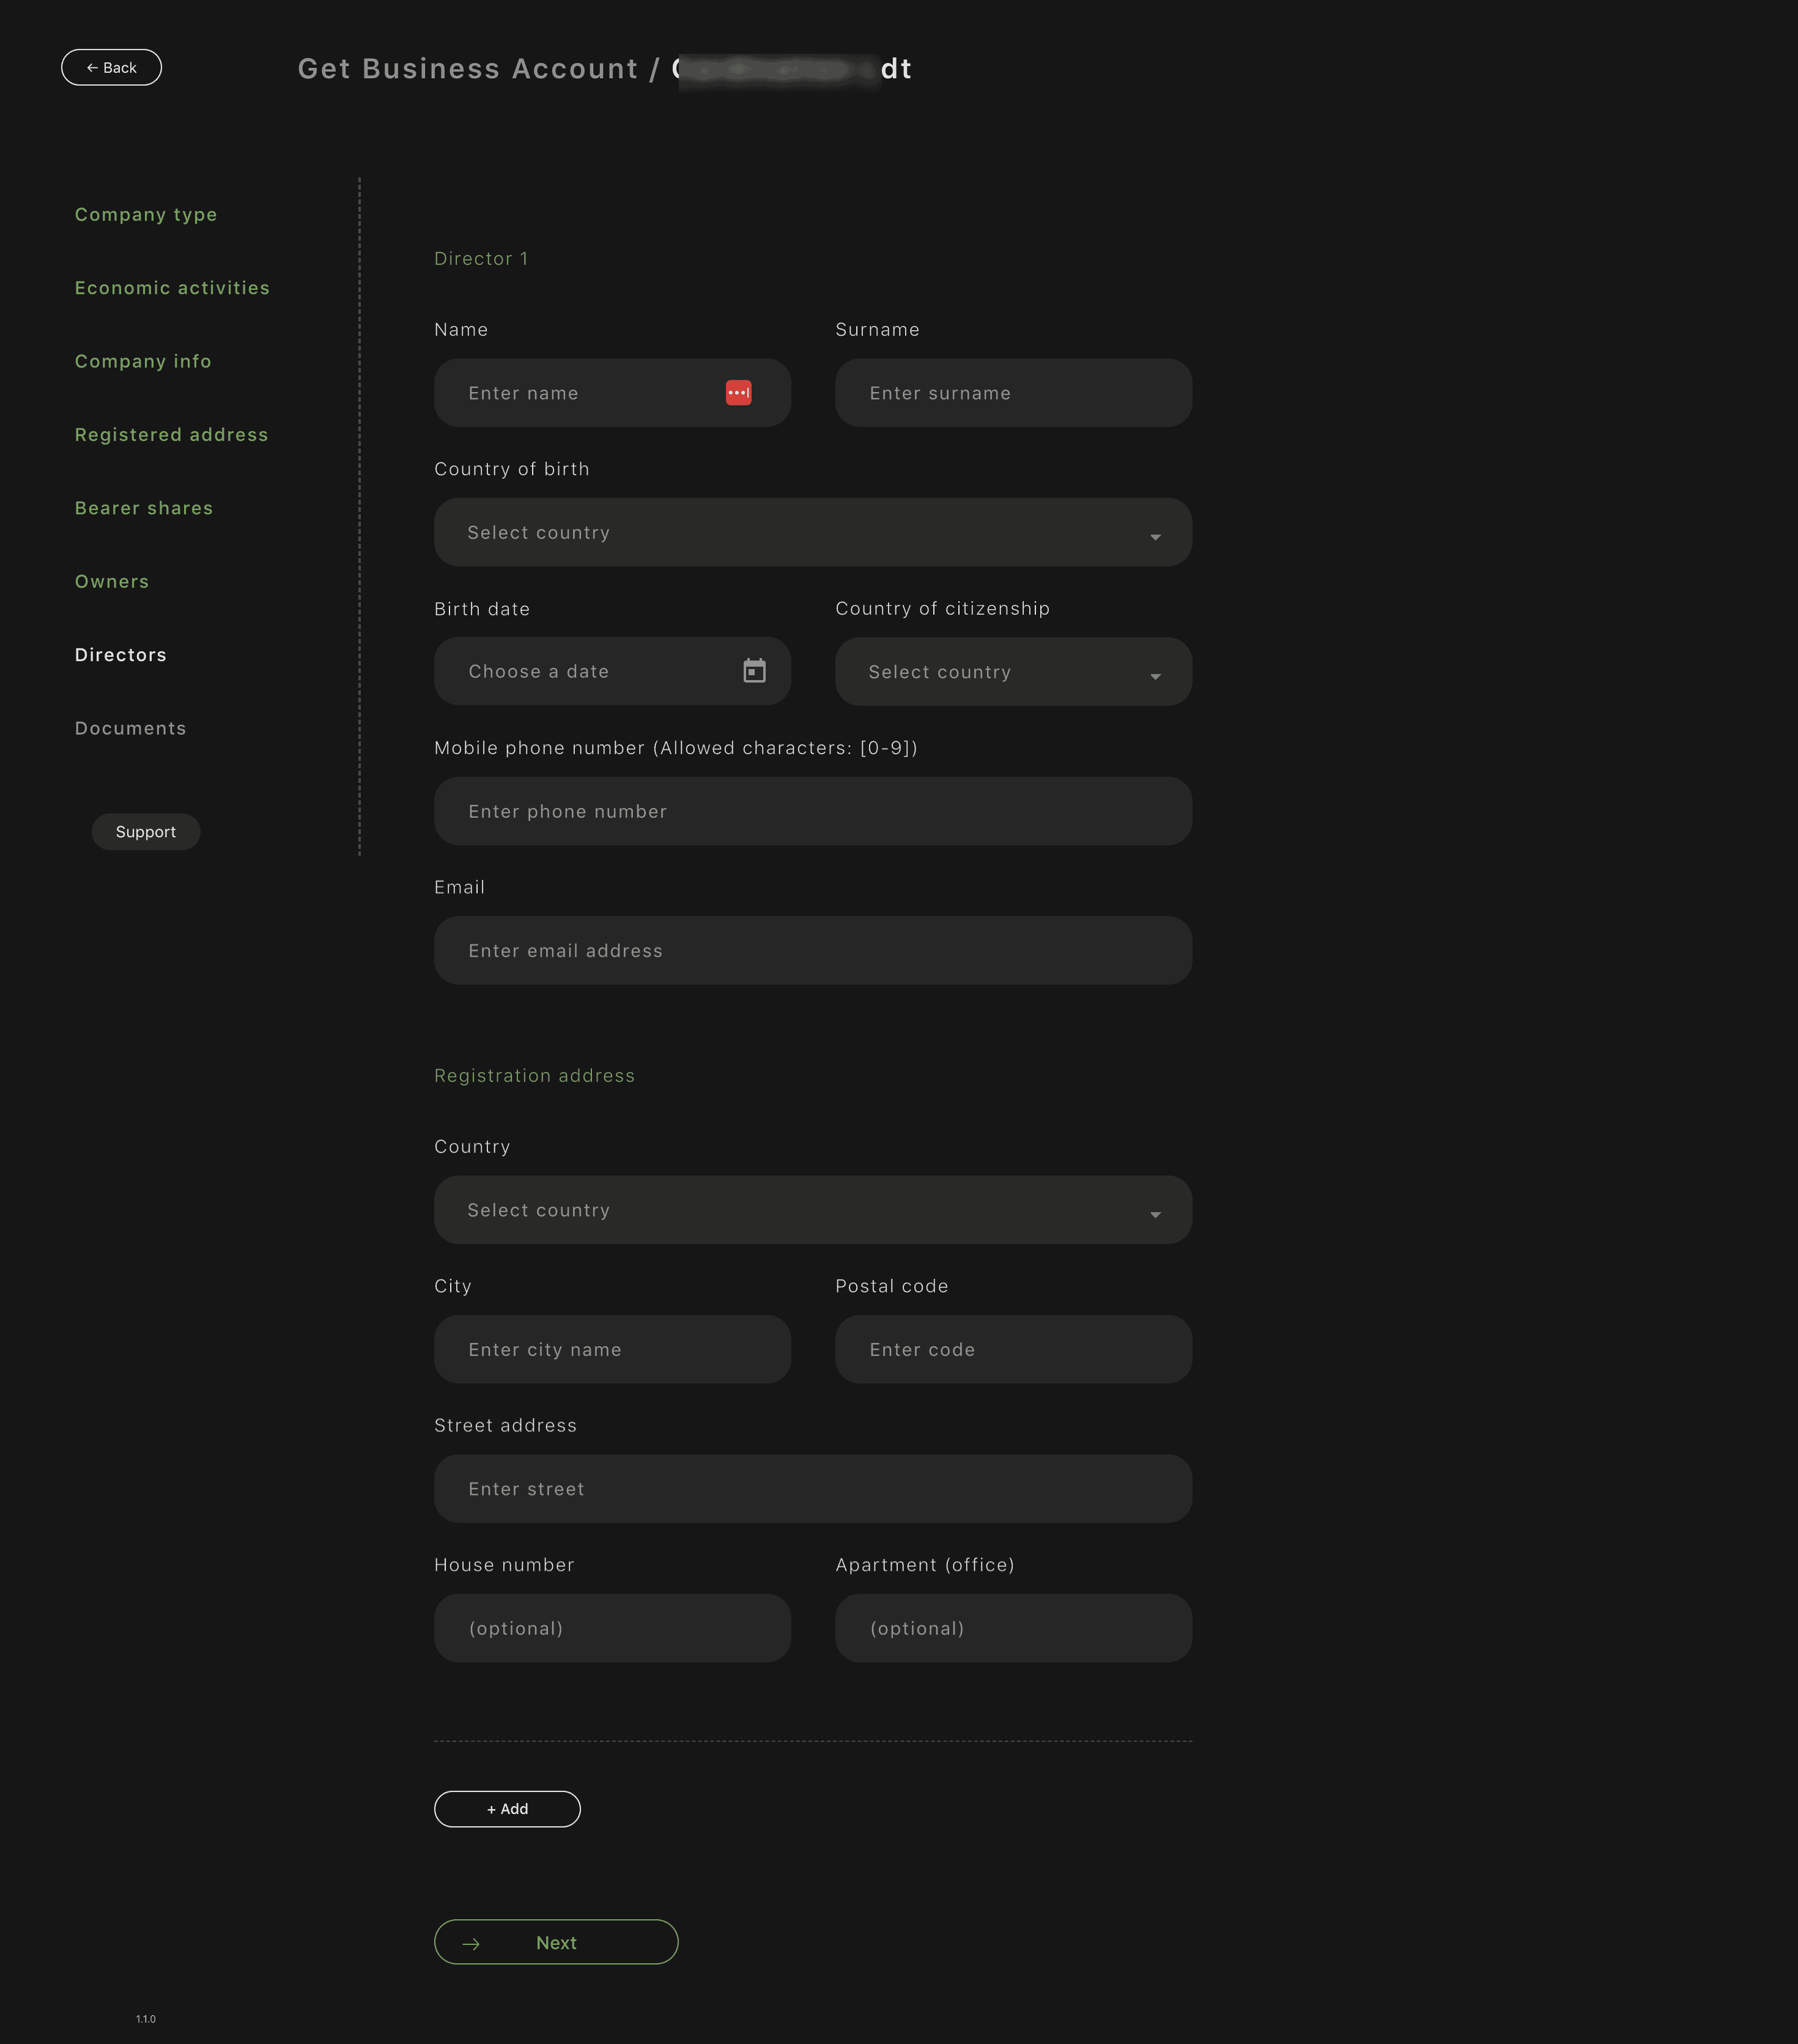
For each director, provide:
Personal details:
- Name and surname (as in passport)
- Country of birth
- Date of birth (via calendar)
- Citizenship
- Phone number
- Personal e-mail
Address details:
- Country
- City
- Postal code
- Street
- House number / office
If there are multiple directors:
- Click + Add and complete details for each one.
Important:
- Even if you are the Owner, you must add yourself as Director if applicable.
- All directors listed in company documents must be added.
Common mistakes:
- Abbreviated names.
- Missing second director.
- Using corporate instead of personal e-mail.
Step 8. Upload Company Documents and Submit
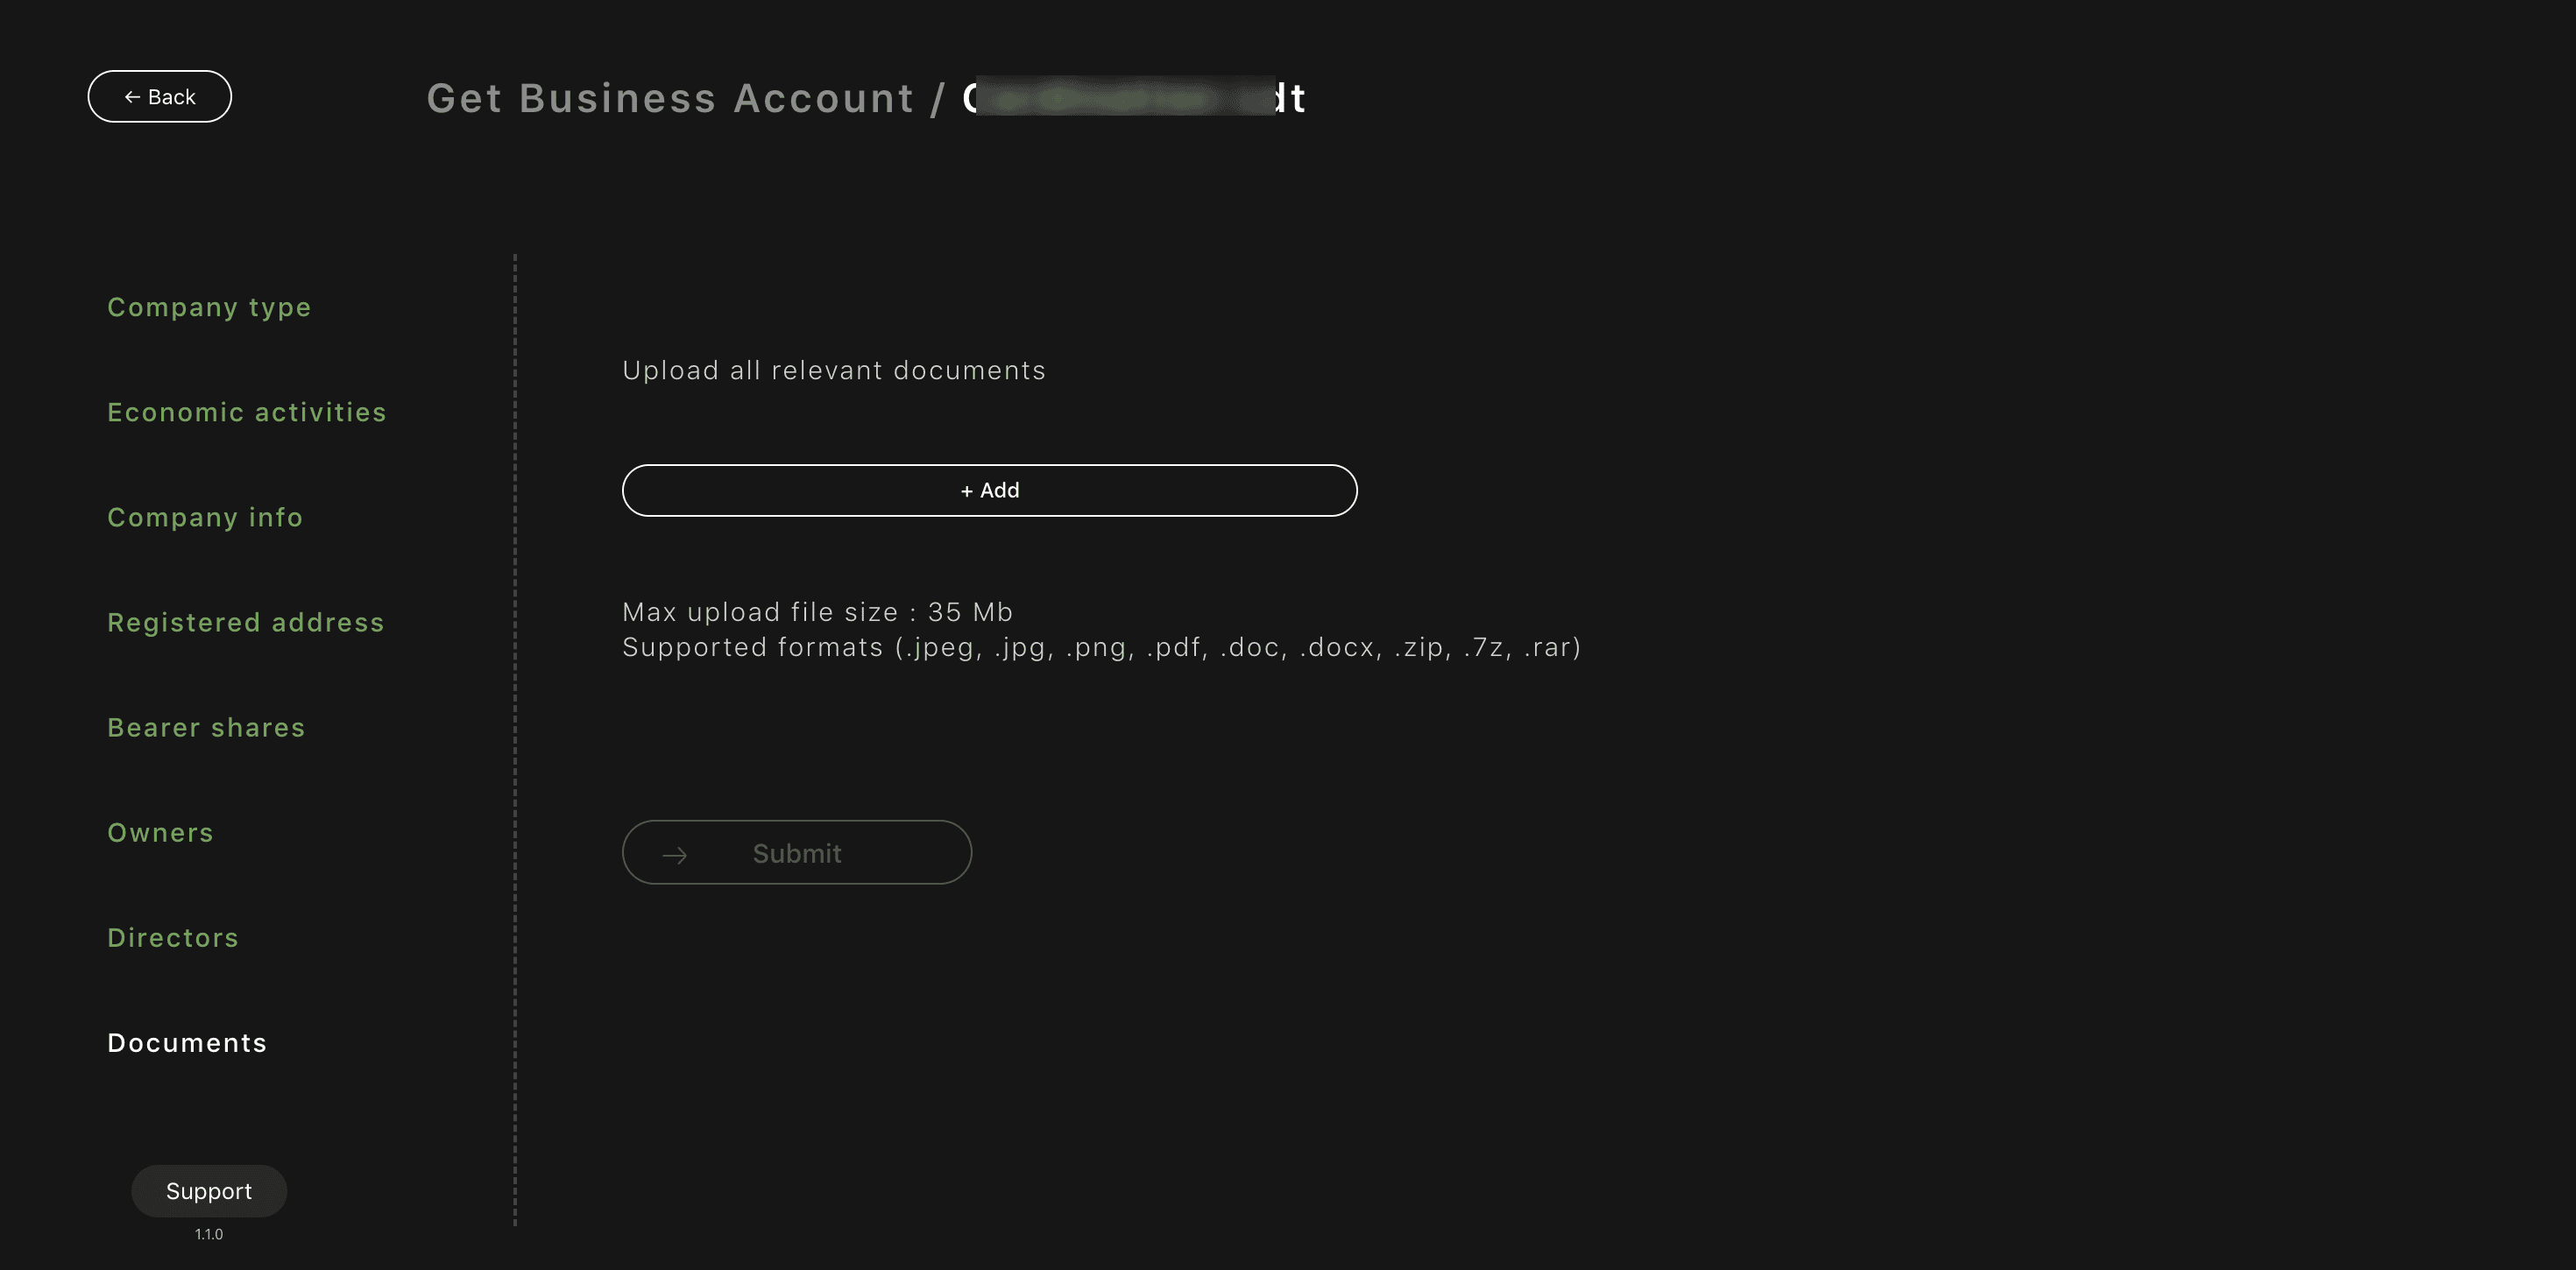
Click + Add and upload all relevant documents.
Typically required:
- Certificate of Incorporation / Company Extract
- Articles / Memorandum of Association
- Shareholder register
- Ownership structure
- Director and UBO documents (if requested)
- Power of Attorney (if Proxy selected)
Technical requirements:
- Max file size: 35 MB
- Supported formats:
- .jpeg, .jpg, .png, .pdf, .doc, .docx, .zip, .7z, .rar
Best practice:
- Use clear file names
- (e.g. Certificate_of_Incorporation.pdf).
- Upload readable scans, no cropped edges.
After uploading:
- Click Submit.
Step 9. Application Submitted
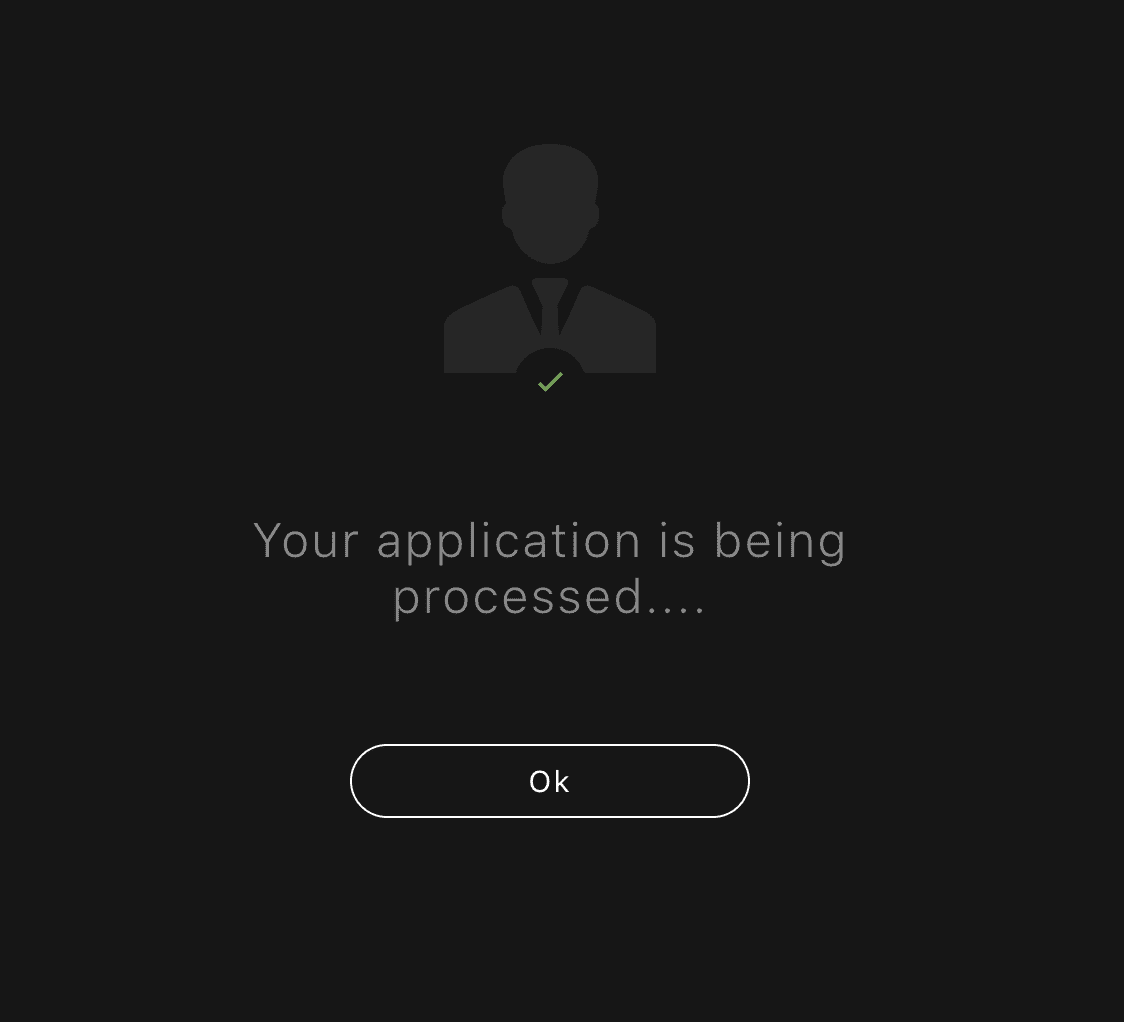
You will see:
“Your application is being processed…”
What this means:
- Your business application has been successfully submitted.
- Compliance review is in progress.
What happens next:
- Review time depends on company structure and jurisdiction.
- You may be contacted by e-mail for clarifications or additional documents.
- Once approved, the business account will appear in your interface.
Important:
- Do not re-submit the application.
- No need to contact support on day one.
- If there is no update after several business days, a polite follow-up is acceptable.
Memo
- Accuracy and document consistency significantly reduce review time.
- Most delays come from incorrect roles, addresses, or missing documents.